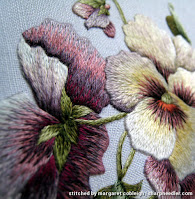
 Here's a fun piece I stitched a couple of years ago. It's yet another wonderful thread painting design by Trish Burr called Victorian Pansies.
I did a lot of 'what if I...' work on this piece and tried to challenge myself to see what would happen.
Warning: this is going to be a terribly geeky post. Feel free to skip the text and enjoy the pictures.
Victorian Pansies was a downloadable pattern from Country Bumpkin (former publishers of Inspirations magazine). (It is currently available directly from Trish.) It was my first experience with a downloaded pattern and I waffled a long time before deciding to buy it. I used to be extremely lazy about tracing patterns. I really didn't enjoy tracing, but due to my experience with this project my attitude has completely changed and I now generally prefer tracing projects to buying pre-printed designs.
There are two big advantages to doing your own tracing: you can make changes to the design and you can choose your own ground fabric. I'm hooked on downloadable patterns now. I've also become quite adept at tracing the patterns by hand and/or printing them onto fabric.
Here's the original design as stitched by Trish:
I was intrigued by the mauve of the pansies and the mix of warm and cool greens. The palette was just a little different, but very Victorian. Oh yeah, and, it was pansies and I never seem to tire of embroidering pansies!
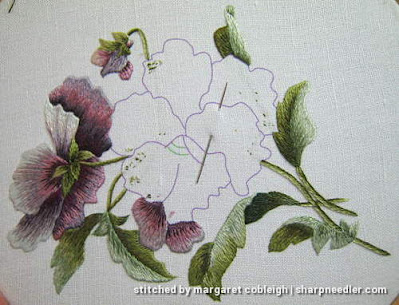
I made some changes, however. The design is an adaptation of a piece of Victorian ephemera and the Victorians seem to have had a thing about upside down pansies. I'm not overly thrilled by this so I chose to turn the design 90 degrees to the left in order to have upright pansies. I am in no way implying that there is anything wrong with the original design. I could certainly have happily stitched the pansies as designed, but I'm looking for challenges and it's easier to adapt an existing design than to come up with originals.
After twisting the pansies, I decided to move the bud to the top. Then, I was ready to stitch.
Geek note: I made a printable pattern of the pansies so I could easily rotate, move things around, etc. I coloured the lines of the pattern (note that the petals are purple in the above image) because I find it more pleasing to stitch and it does help differentiate the elements (and related element groupings) of the pattern. I then printed my new pattern (which is only for my use--absolutely no sharing!) via inkjet printer onto the embroidery fabric.
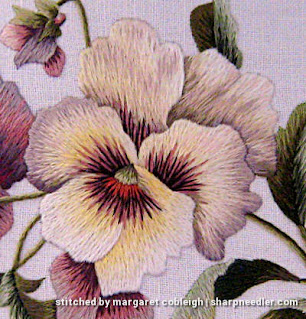
I focused on heightening the contrast between the edges of the various pansy petals to see if I could make them have good separation from one another. I did not want them to melt into each other visually. To do this you ensure that petal edges that overlap other petals, have darker colours on the petal below/behind the upper petal. You try to avoid having the same colour 'touch' between the two elements.
Here is the main pansy with some of the contrast work completed.
As I worked on the contrast between the petals I became interested in enhancing the shading on the upper right back petal. I wanted the shading to go across the petal rather than only going in the direction of the stitching (which is easy). While I'm pleased with how it eventually turned out (visually), I am not happy with the amount of stitching that is on the petal. It is completely overworked. In order to get another stitch into that petal you would need a pair of pliers to push/pull the needle! That's not good, but I was experimenting and so I did a lot of overstitching in order to get a smudgy effect. One of the great things about thread painting is that you can do quite a bit of stitching right over the top of already existing stitching. There are limits, however, and you shouldn't overdo it as I did on this petal.
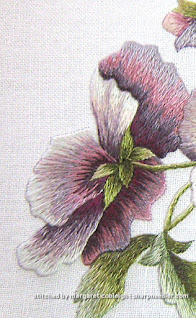
Another thing I tried was to lay a few stitches of light colour on top of the top left petal. Normally you want your stitches to blend in and not be noticeable. I laid these threads right on top of the already-stitched petal to see what would happen. I used the lightest lavender and pink that were part of the project and they provided just a hint of colour almost like taking a coloured pencil and drawing a few light marks. It worked quite well and I would do it again, but with care.
There are some aspects of the dark left pansy that I think turned out well. These include the ruffles on the upper petal and the very, very thin lightly-coloured line along the edge of the lower left petal. I also really like the sepals on the dark pansy. They look like coloured pencil which I think is always my underlying goal with thread painting.
By the way, I only used the threads that were required by the project. I didn't add any additional colours.
The finished piece:
I thoroughly enjoyed stitching the 90-degree twisted pansies and by challenging myself to try some different things I have expanded my bag of tricks for future projects (I hope). I sometimes think about restitching this project in order to make a 'clean' version, but there are too many other things I want to stitch in this life and not enough time, of course.
References


I love reading your blog and your insight and creativity in stitching. Your breakdown of your pieces and what you did different or added really gives me inspiration to try "what if" scenarios. Your stitching is so beautiful too. 😊
ReplyDelete