I've come to the end of the 'challenging' hares on Jenny McWhinney's Queen Anne's Lace embroidered accessories set. This should be the last critter with
tricky areas to stitch. I'm also going to share how I'm working the hares'
eyes which is different from the kit instructions.
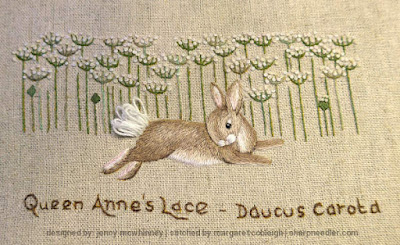
This comparatively large embroidered panel is the front of a travel pouch. All the flower stalks--and there are many--were embroidered before starting on the hare.
This is Jenny's original travel pouch which looks to be a very nice item when finished. It has a plastic window and closes with a zipper. The hare on the front is having a lie down.

|
| Queen Anne's Lace Travel Pouch by Jenny McWhinney |
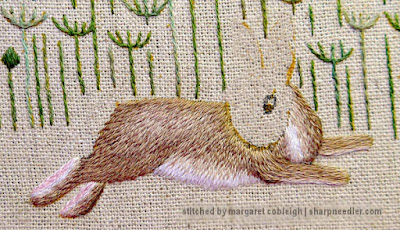
With the cats' supervision--there's always more than one on my lap--I started on the resting hare. I expected this one to be interesting around the right front paw where the elbow curves upwards. It's a tight curve in a tiny area.
As the design is wide, but not very tall a standard round hoop wouldn't work
without moving it around the embroidery. I considered some ovals and then
noticed a different shape of hoop which has lain unused in my stash for
several years. It's a Hardwicke Manor 'square round' and it worked great for
this horizontal design. It held the fabric just as taut as a round or oval
hoop, and didn't have any of the problems I've encountered with square hoops
which don't hold well on the corners. I will be using this hoop more often in
the future!

|
| Jing Jing mimicking the hare's pose? |
The back end of the critter turned out reasonably well:
The front right paw worked out OK. It could be a little bit neater, but it's
not bad.
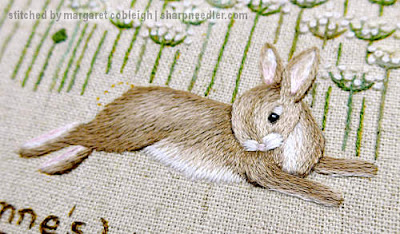
The head and ears look good (almost done!):
All of the Queen Anne's Lace kits come with black beads for the eyes, but I have chosen to
embroider the eyes instead. First, I outline the eye with split stitch using the
next darker colour to the surrounding embroidery. This creates a subtle shadow
and definition around the eye. (These photos have been over-sharpened to show detail.)
Then I fill with some black for the pupil. Because this hare is so small I stitch halfway
into the split stitched outline so that I'm not left with too much of the
outline showing. I just want a sliver of outline visible when I'm done.
Magnification is very helpful with this!
Finally, the white part of the eye and the highlight are added:
The flower heads were completed along with the writing below the hare:
To finish off, the tail--left untrimmed for now--was added:
This recumbent hare has inspired me to give these hares a rest as well. I only
have two to go, and they should be fairly easy, but I want to take a break
from these guys.


The embroidered eyes work really well!
ReplyDeleteYes, I like them, too. My experiment worked! :-)
DeleteThank you for sharing, very helpful. Beautiful work, as always. I enjoy seeing your projects.
ReplyDeleteThank you. Always happy to share!
Deletecan you post the pattern PDF as I am unable to buy the pattern any more.
ReplyDeleteNo, I cannot post the pattern. It is a copyrighted design and it would be illegal, not to mention inappropriate, for me to post the design.
DeleteI would suggest that you contact The Bobbin Tree and see if they can source the pattern/instructions for you.