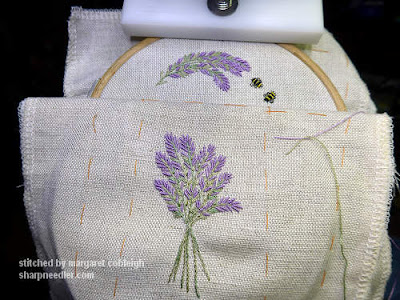
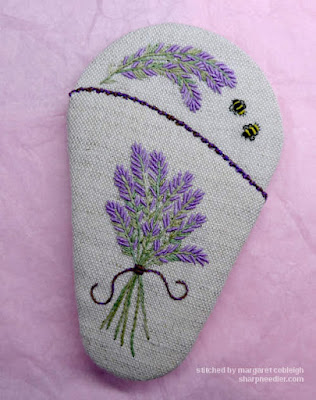
The original design consists of a lavender bunch on the front and a lavender spray with bees on the inside of the back.
I wanted to add a few extra finishing touches, but not go too crazy!
There were three items I decided to add/modify:
- A tie for the lavender bunch on the front
- An initial for the back
- A fob
Tying Up the Lavender
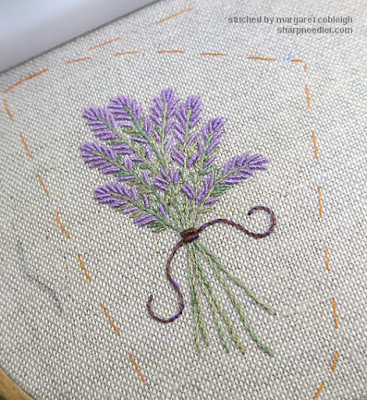
On the original, Lorna used a piece of ribbon to 'tie' the bunch together. It's very pretty, but its streamers are loose and I knew that having something loose on the keeper wouldn't be compatible with how I use my tools. Everything needs to be well-attached because I don't necessarily pay attention to what I'm doing when I reach for a tool! (I also don't trust the cats.)
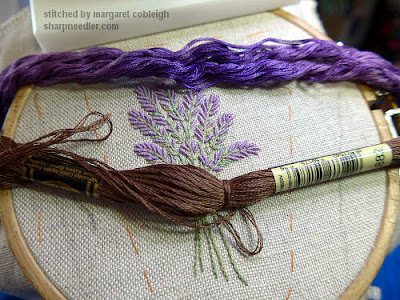
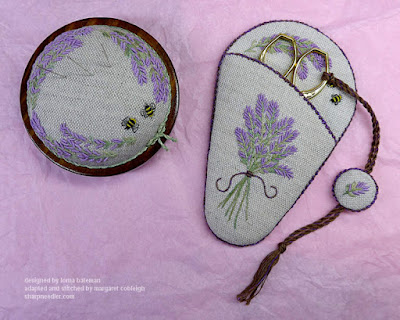
It took me a while to figure out what colour to use for the tie and I finally decided on a combination of brown and purple. The brown was chosen to associate the scissors keeper more closely with its matching pincushion which has a dark brown base. I used a new DMC brown that was released last year (#3882). It looks great with the dark purple variegated Chameleon thread I found in my stash.
Using a mix of the two colours in the needle, I placed a couple of bullions across the lavender bunch and then added some stem stitched streamers off the bullions.
Signing the Back
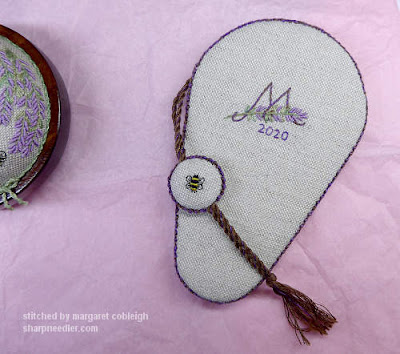
The back of the scissors keeper could be left blank, but why? I signed the other scissors keeper, so I have to sign this one! However, adding the initial took much longer than I thought it would, and it didn't go smoothly.
I sketched some ideas on a phone and eventually came up with one that I thought would work. Then, that image was loaded into vector drawing software in order to make a clean line drawing. Figuring out how to transfer the line drawing to the fabric was more difficult than usual. I wanted extremely precise, smooth lines. Basically, they needed to be perfect. Tracing wouldn't work because drawing on the ground fabric is difficult and getting a smooth line could be challenging. I wanted to use the tissue paper transfer method, but I didn't think I'd get a precise enough line when I traced onto the tissue paper. I ended up using the printout of the design from the printer and then basting that down on the fabric. However, pulling printer paper off after basting is much more difficult than tissue paper! Fortunately, I did end up with a very clean design to stitch, it just took a while.
Unfortunately, I did something stupid with the basting by using my usual orange basting thread to tack down the design. It would have been much better to use basting thread colours that matched the embroidery (e.g., green and brown). Removing the orange thread after completing the embroidery was absolutely awful and created a little bit of damage to the stitching. The damage was repairable, but it could have been avoided if I hadn't had to remove the basting thread. Please learn from my mistake. Hopefully, I will, too!
The actual embroidery of the initial was quite simple and went quickly unlike the rest of the process! Thank goodness, it turned out OK.
Making a Fob
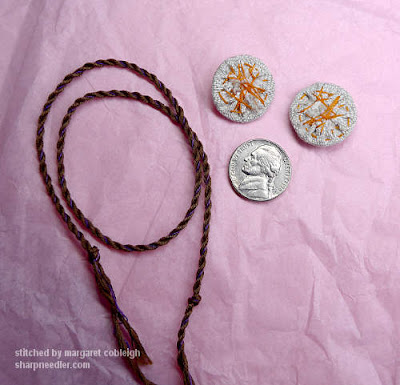
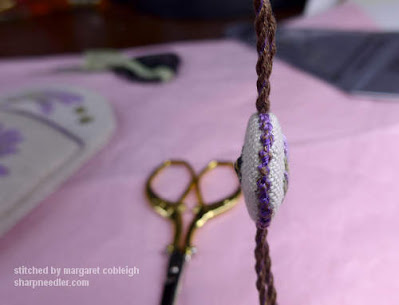
As soon as I selected the brown and purple threads, I knew that the fob would be attached with a brown cord. I made the cord out of solid brown thread and then wrapped a single strand of purple around the cord.
The fob is very small. The template was a nickel (a little bigger than 2cm in diameter). The two embroidered sides had to be laced, they were too small to glue.
The cord was placed between the two halves of the fob and then it was outlined with Palestrina stitch with brown and purple in the needle. The Palestrina outline looks a little crooked in the photo, but was easily adjusted.
The fob turned out reasonably well though it was quite fiddly to make.
Constructing the Keeper
With the fob completed, the only task left was putting the keeper together.
The fob was made first because I needed to see how the dark outline looked. I couldn't decide if I wanted to put a dark outline on the keeper or use the green that came with the kit. I have a love/hate relationship with dark outlines. They can look very cartoonish, but I liked how the fob turned out so I went for the dark outline on the keeper. It's a combination of three strands of brown and three strands of purple.
The first test of the dark outline was along the top edge of the front piece. I was curious to see how it would turn out and I knew that I had to stitch it as neatly as possible. When there's a lot of contrast all stitching anomalies are magnified. Also, because I like the asymmetrical curve on the front so much, it was really important that it looked good!
I was happy with the initial dark outline and finished off the keeper by stitching the outer edge. This is the back along with the other side of the fob:
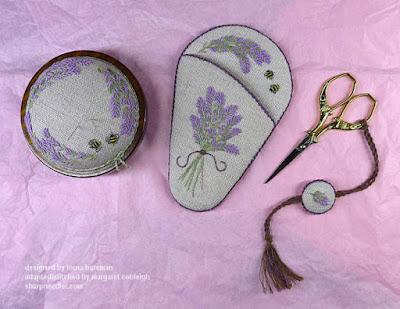
Here's the finished keeper with its matching pincushion. (The Italian Premax scissors came with the kit.) I like the brown and purple touches on the keeper/fob and the items really do look like a matched set.





This project turned out beautifully! I like the changes you made; I think it is
ReplyDeleteimportant to personalize any purchased kit by making such changes.
Thank you for all the detailed instructions you provide to those of us who need help getting started in surface stitching, especially when attending a formal class may not be an option.
This morning I took some time to look through you archives of projects and it was a real inspiration. I think some of my cross stitch UFO's will be pushed to the back of box and a needle painting blue bird kit from Tanya Berlin will be my next project.
Thank you. I really appreciate your comments. I appear to be in a phase of 'playing' with other people's designs.
DeleteTanja Berlin kits are a great choice for shaded work, especially for beginners. (They're great for more experienced stitchers, as well.) She has excellent instructions and puts shading guidelines on her designs which is very helpful when you are learning.
That's delightful. I really like your bullion knot and stemstitch tie for the bunch of lavender. Unfussy, and really effective!
ReplyDeleteThank you, I like the way it turned out, too! :-)
DeleteThe tie was inspired by something I saw in one of Elisabetta Sforza's books. She used bullion knots to 'tie' a bunch of stems together. The initial on the back of the keeper was also inspired by Elisabetta. I saw an 'M' with a loop in the middle which influenced my design for the initial.
Absolutely beautiful set! I love when things are pretty and practical too :) The brown goes with the lavenders perfectly, and the little bow is so cute! The monogram turned out lovely too. Sometimes it's fun to follow a kit where the big things are figured out already; I just did a vintage crewel one and really enjoyed not wimbling over every little decision like usual :)
ReplyDelete