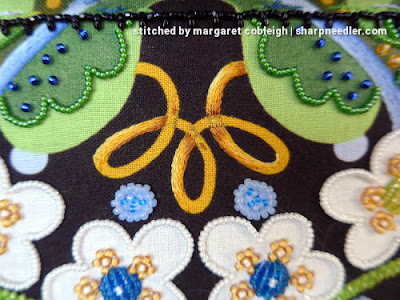
The plan was to use surface embroidery to enhance Curly with the look of coloured pencil. My goal was to have the shaded loops appear as if they had been printed on the fabric, and only by looking closely would you know that they were stitched.
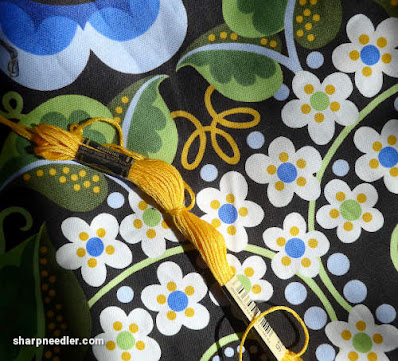
To begin, I selected a lot of potential colours!
I knew I wouldn't use all of the initial colours--I anticipated using around 5 shades--but I wanted to keep my options open.
The first thread choice was the colour that best matched Curly.
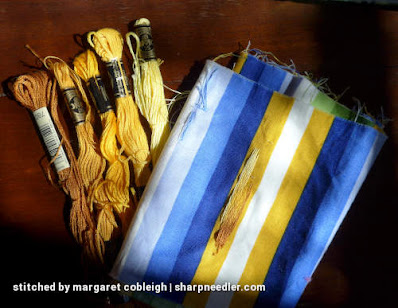
Working off this base colour, I chose two shades lighter and two shades darker. Then it was time to see how well the shades would work together. Using a striped fabric that coordinates with Wild Child's ground fabric, the shades were tested on the same orangey gold colour as the loops.
The initial five shades worked out nicely. They had to blend both into and next to each other. It was a relief to have the first colour choices succeed!
The final test was on a duplicate piece of Wild Child fabric where I could practice on Curly's twin before stitching on the actual project.
All the testing went well, so I moved on to the real Wild Child. It was still a bit nerve-racking because I didn't know exactly how it would turn out and I had to get it right on the first try. I didn't want to have to remove any stitching since the ground fabric is cotton and it wouldn't hold up to a lot of stitching and re-stitching.
Fortunately, I had a new scissors keeper to help me out.
I spent quite a bit of time figuring out how I wanted the shading to appear before commencing any stitching. This involved long periods of time staring at Curly and some simple sketching. I did a lot of visualising of how the highlights and shadows should fall on the loops.
Working Curly from back to front areas, I embroidered the underneath parts of the loops first.
Next, the upper parts of the loops were worked from the right loop to the left loop in order to catch the rest of the underneath bits.
I was happy with how they were turning out. The most difficult parts were where the loops turn at the bottom. The stitch lengths had to be very small in order to get around the tight curves and shading with short stitches is not fun!
I did a little bit more tweaking and am leaving Curly alone...for the moment. I still think the loops could use a tiny bit of touch-up here and there. However, I wanted to move on and return later with fresh eyes.
Here are the loops in the context of the entire piece:
The last challenge on this project were the little gold discs at the bottom. In order to balance with the loops at the top they had to be surface embroidered, but I didn't want to call attention to them. Also, the partial discs peeking up along the bottom edge needed to disappear.
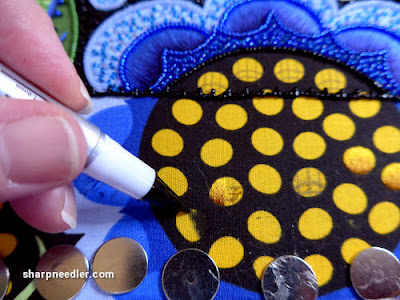
I used a black fabric marker to colour out the unwanted discs, but first tested the marker on an area outside of the border.
I was not thrilled by the idea of having a felt tip pen anywhere near my embroidery, but needs must! The pen worked quite well. I coloured on both the back and front of the fabric in order to achieve good coverage. The ink from the pen bled somewhat, but not a lot, and it wasn't a problem because the surrounding colour is black.
The discs were embroidered with vertical stitches using the the three darkest loop shades. They were not outlined with split stitch first as I wanted the finished embroidery to be as flat as possible. These elements are not supposed to to draw any attention to themselves.
The bottom shadows make the discs flatten out a bit and they look like little setting suns. I wish the discs were located more symmetrically on the fabric, but they're at the bottom of the purse and with all of the other stuff happening on this piece the lack of symmetry won't matter.
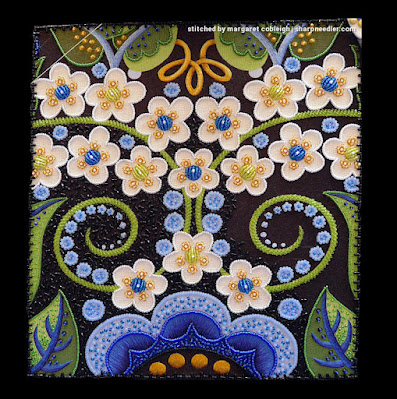
Here's how Wild Child looks at the moment. I added a black border digitally to get a better idea of how it will appear when finished as a purse.
I suspect there will be a few more tweaks to Curly, and possibly the discs as well, but I'm glad (relieved!) they're mostly done. All that's left are a few beaded outlines at the top and finishing off the black beaded filling.







Wow ! You have transformed that piece of fabric . It is already on it's way to becoming a beautiful jewel-like purse .
ReplyDeleteI love how the cord came out. It looks so realistic from afar.
ReplyDeleteI have two Siamese assistants myself - Freya and Ragnar. Freya is well behaved but Ragnar wants to chew everything...
ReplyDeleteOne of mine likes to chew a bit as well (Suki), but it's mostly plastic related and she's not nearly as bad as my previous meezer, Koko, who chewed up all sorts of things. Koji is pretty good most of the time, but his sister Suki is, um, interesting...and I adore them both!
Delete