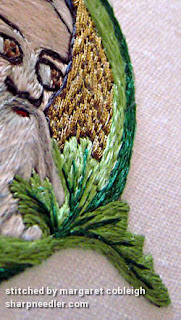
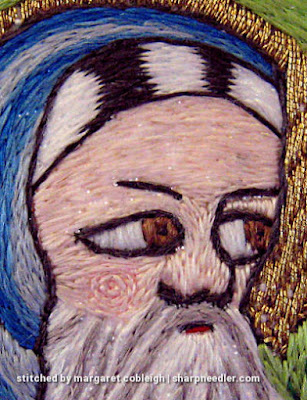
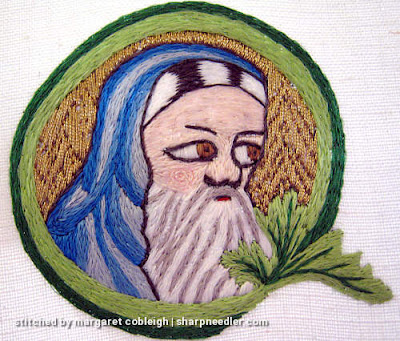
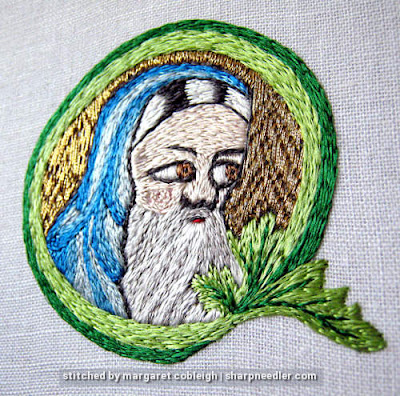
One of the classes was Opus Anglicanum (translation: English Work) which I don't think I'd even heard of at the time! We worked a traditional Medieval character in silk and gold threads.
I was especially fascinated with the underside gold couching on the background of the design. We used Japanese gold #2 or Benton & Johnson’s 341 (i.e., imitation gold thread). Normally, you would stitch all of the gold background first, but since this was a class, we stitched some of the figure before completing the goldwork.
In underside couching you lay a pair of gold threads on top of the fabric, come up from underneath with a couching thread, then go back down into the same hole you came up in, pulling a little bit of the gold thread to the back of the fabric. Pulling the thread down into the ground fabric creates a pattern in the gold on the surface of the piece, and all the couching thread ends up on the back.
Here's the back with the underside couching in progress:
An excellent tip that I learned in the class was that after you finish the underside couching, use your embroidery scissors handles to burnish the gold. Rub the scissors gently, but with a bit of firmness in the same direction that the gold is laid on the fabric. It makes the gold threads lay flatter and neater.
The ground fabric is two pieces of handkerchief linen. The figure is split stitched in flat silk (Kreinik Soie Platte, since discontinued). The split stitch embroidery was quite easy, and it was fun stitching the circle for his cheek.
I don't remember if the project had a name other than Opus Anglicanum, but I call him 'Little Man' because he's very small, about 2-3 inches (5-7.5 cm) in diameter.
In the completed 'Little Man', the underside couching on the left side isn't very distinct and the zig zag pattern is nearly invisible. Honestly, I had no idea what I was doing when I started the couching. The right side turned out much better!
Given that the project is stitched with gold and flat silk, it's very reflective and blingy. Here's a view with the light hitting the embroidery:
I attended the Opus Anglicanum exhibit at the Victoria and Albert Museum (V&A) in 2016 and was incredibly impressed by the fineness of the stitching on the original works. (I'm so glad I had a magnifier!) I was especially mesmerised by the underside couching. My 'Little Man' is baby steps compared to the real thing. The Medieval embroiderers used much finer silk and gold threads, and their stitching is exquisite and so tiny! The exhibit catalog, English Medieval Embroidery: Opus Anglicanum, is well worth having if you are interested in Medieval embroidery.
References
- V&A - Opus Anglicanum: Masterpieces of English Medieval Embroidery
- Needle 'n Thread: Opus Anglicanum: English Medieval Embroidery (Little Man was featured on Needle 'n Thread several years ago.)


Thanks for the Little Man intro to Opus Anglicanum!
ReplyDeleteGlad you enjoyed it. He was fun to stitch!
DeleteLove him ! :) ...I love to recreate early embroidery too !
ReplyDeleteStill an awesome piece! I love the flow of the stitching.
ReplyDeleteWhat a lovely project! And I know all about not being able to replicate the originals due to a lack of the right (much finer) materials :(.
ReplyDeleteMuch as I love the originals, I'm not sure I'd want to replicate them given how tiny the materials were. I don't think my eyes would survive! :-)
DeleteWhat a lovely piece! The underside couching sounds like a difficult stitch to master, thank you for your explanation.
ReplyDeleteIt was a very interesting little project. Underside couching isn't difficult at all. I just had no idea what it was, so when I started doing it I didn't know what it was supposed to look like! Internally, I must have looked like a deer in the headlights when I heard the initial instructions on what we were supposed to be doing. :-)
DeleteI love the look of underside couching and at some point I'll share a teaching piece I designed using this technique. It's well-worth learning. It might be one of those things that is easier to understand when you see someone do it rather than read about it.
What a fun piece! Thank you for sharing!
ReplyDeleteNora