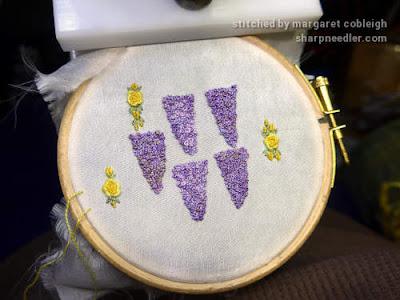
Here's the final bit of embroidery for the back of the keeper:
I don't know if it's obvious, but that's my initial and the date with a little bee, of course. I wanted it to be a bit obscure.
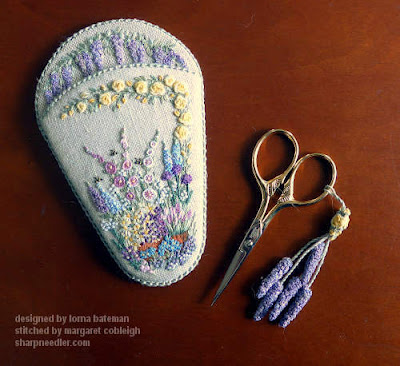
The three pieces of embroidery that make up the scissors keeper are finally complete and ready for assembly:
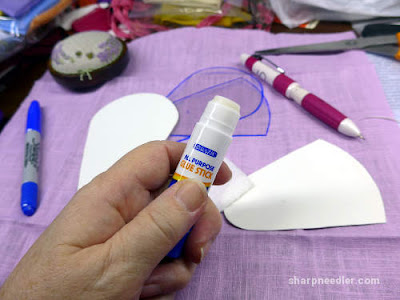
I made pattern templates and cut out the mounting pieces and the embroidered elements. The templates are composed of plastic which allows you to see through to the embroidery for easier placement. That was a really good tip from Lorna!
I had to widen the pattern just a bit due to my overzealous stitching on the front of the scissors keeper. I used the width of the wide end of a sharpie to enlarge the pattern on either side. So, the scissors keeper is two sharpie widths wider than the original. The height is the same as the original.
For the mounting pieces I used some white acid-free heavy card that I had on hand. It's similar to poster board, but not quite as thick.
Time to glue. Groan.
I bought the glue on Amazon. It's acid-free, dries clear, and is suitable for textiles. I know very little about glue, but this sounded reasonable.
The gluing went OK. I can't say I enjoyed it, but it wasn't bad. I still don't like having glue near my embroidery!
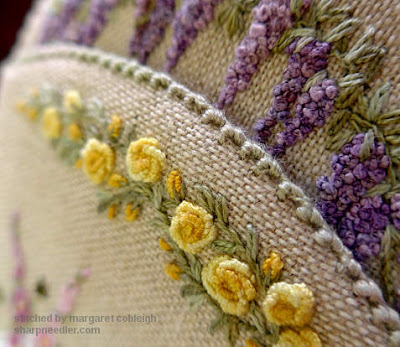
After everything was glued, I was able to return to my normal milieu of needle and thread. I edged the top of the front with lovely Palestrina stitch using six strands of variegated cotton floss (also by Chameleon threads).
I then attached the front to the back with invisible thread and a curved needle. (The Lavender and Bees Pincushion came in handy!) The final step was to edge the back with more Palestrina stitches and the scissors keeper was done!
Well, sort of. There was one more element to make in order to finish the project: the scissors fob. I'm not going to go into great detail on how to make the fob. If you're curious about the particulars, you should buy Lorna's book. Suffice it to say that it was an interesting process.
First, I embroidered these bits and pieces. I didn't know if I was going to use the roses, but made some just in case.
After adding water they turned into this:
I made some cord, did lots of stitching, and the bits became a wisteria fob with a bullion rose 'bead' on top. I ended up using all three bullion rose sprays. Somehow, they magically fitted together. I'm not sure how that happened! Lorna's original fob had three wisteria racemes. I made extra in case there were problems, but they were all fine so, I used them all. It's a bit over the top, but I like it. One can never have too much purple!
I wasn't sure I had enough cord left on top to loop the fob bits through on the scissors handle, but it worked. By the way, the Italian Premax scissors came with the kit which was a nice touch by Lorna.
Done!
This was an excellent project for me. I got to play with new threads and experiment with colour. I also learned some new finishing techniques. I like having a project that allows for adaptation from the original (and a teacher who encourages it!). It's fun to make something uniquely one's own.


That looks brilliant. And I would have felt the same about the glue. Thanks to studying medieval embroidery, I have become way more relaxed about doing my embroidery the right way. But glue might be a step too far for the moment ..
ReplyDeleteAlthough gluing is not my favourite thing, it was necessary in this case.
DeleteBeautiful!
ReplyDeleteThank you. :-)
DeleteOh ! Very well done ! So pretty. I keep promising myself to make one for my embroidery scissors . I could do with several :)
ReplyDeleteYou should try it. They're not difficult to make. Practically speaking, though, I probably need a much less fancy keeper for everyday use. I don't think this keeper would last long if I used it on a daily basis. Bad things would happen to it! I am happy to have it as a decorative item if I don't end up using it. It was a good experience.
DeleteThat's a great success. You're not the only one who twitches at the combination of glue and embroidery...
ReplyDeleteThanks!
DeleteGluing the scissors keeper really wasn't that bad, but I'm still squeamish around glue! I'm commitment phobic when it comes to embroidery and glue seems so permanent. :-)
It is beautiful and we should all have some impractical, but wonderful pieces that we can enjoy creating. They are works of art and personal treasures that will make one happy for years to come.
ReplyDeleteThank you and I completely agree! The joy was in the creation.
Delete