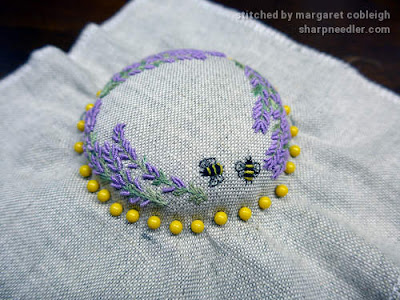
Lorna encouraged us to try different stitches for the lavender buds. She suggested using cast-on and drizzle along with bullion. I stuck to bullions because that's why I was there!
I didn't take many in-progress photos because it's a very straightforward project: lots of bullions with some greenery (and a pair of bees, of course).
The thread has a beautiful sheen and I enjoyed embroidering with it. It didn't take very long to finish off the sprigs of lavender.
The bees are composed of (more) bullions with DMC cotton floss and some sparkly metallic thread for the wings. Once they were added the embroidery was complete.
I probably ended up with more lavender bullions than is necessary, but I certainly achieved my goal for lots of bullion practice. Now to the hard part: finishing!
I dry-fitted the embroidery on the pincushion with pins and planned on attaching it with glue. However, I just didn't feel comfortable with the idea of gluing. I found that when I gathered the fabric on the back of the pincushion I started thinking about gluing the fabric and realised that I was going to have problems controlling the fabric with the glue. I didn't know how the glue was going to behave and I didn't feel like experimenting with my finished embroidery.
I decided to try lacing to see how it would work. It seemed OK.
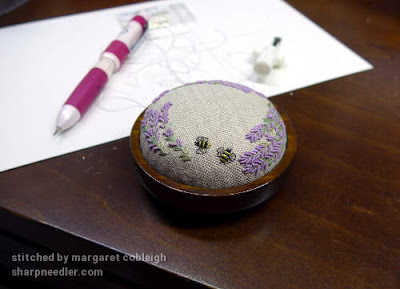
I attached the wooden base and here's the nearly finished pincushion:
By the way, the project kit included the pin cushion form and base with a choice of different woods. I chose the darkest, mahogany. It's about 3.25" (8.5 cm) in diameter.
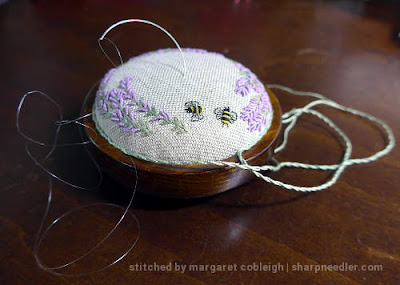
The last step was to place a line of cord around the pincushion to cover the gap between the cushion and the wooden base. I didn't have much of a gap and could have probably skipped the cord. However, I wanted to make the cord as I had never done that before. I created the cord with thread included in the kit for that purpose. I ended up with a fairly thin cord and had planned on gluing it down, but it was so fine that I didn't have much confidence that it could be glued without the glue showing. (Can you tell that I'm not much of a glue fan?)
So, I got out a curved beading needle, some invisible thread, and stitched the cord to the pincushion. It was not difficult to attach the cord with thread. It was very convenient having a pincushion at hand as I stitched around the pincushion!
I finished with a little bow, cut off the tails of the cord, and the pincushion was done.
Between this pincushion and the scissors keeper I certainly got my wish to practice bullions! This was a very easy and satisfying project to stitch and finish. I'm sure I will enjoying using it as much as I enjoyed making it.
Reference
- Lorna Bateman Embroidery
Lorna sells kits along with embroidery supplies such as threads and pincushion blanks in various sizes and finishes.


A very sweet project and beautifully stitched ! :) x
ReplyDeleteThank you. I enjoyed making the pincushion.
DeleteLove it.....
ReplyDeleteIt's lovely! Attaching that little cord looks tricky.
ReplyDeleteI thought it would be difficult to sew the cord on, but it was actually pretty easy with the fine curved needle. I think it would have been harder with a straight needle.
DeleteThis is so cute! I want one <3
ReplyDeleteGo for it! It's a quick, easy, and very satisfying little project.
DeleteBello e inspirador!!!!!!!
ReplyDeleteLove the bullions... so tiny. Your Project turned out lovely.
ReplyDeleteThank you. It was fun!
DeleteI think you have the same attitude to glue as I do!
ReplyDeleteGlue does not make me happy when it's near my embroidery. :-|
Delete