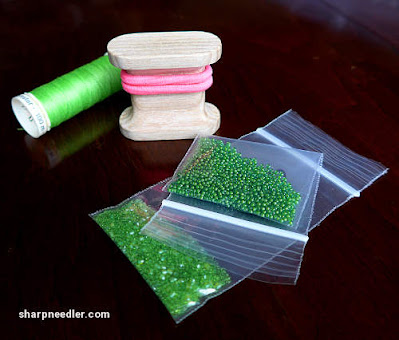
The beading koma is a small piece of wood with a ponytail hairband wrapped around its middle. The koma helps you create smooth lines of couched beads by providing tension for the string that holds the beads.
I've mentioned in previous Wild Child posts that we were able to buy this specialised koma from the class teacher (and Wild Child designer) Mary Alice Sinton. Mary Alice designed the beading koma, and her husband John makes them. The koma has been enormously helpful, and I like it so much that I want to share how it's used.
On Wild Child, I am using two threaded needles for bead couching. Both needles are threaded with Gutermann polyester sewing thread. The first needle is a doubled thread that contains the beads to be couched. I call this the bead thread. The second needle is the couching thread, and it is a single thread.
Here are the basic steps for using a beading koma. In this case, I'm outlining a partial leaf at the edge of the project. (Click on the photos for larger versions.)
Load the Bead Thread with Beads
Bring the bead thread up in the ground fabric at the starting point for the beaded line, and load enough beads to couch the line. (You can add more beads later if you run out.)
Embed the Beading Needle into the Koma
Make sure the pointed end of the needle is well-buried and that the needle lays as flush as possible along the hairband. You will be holding the koma with your hand and it's not pleasant when you grasp the koma and get stuck by the needle--not that that's ever happened to me!
Wrap the Bead Thread Around the Koma
When you are done wrapping, ensure that the bead thread is coming out from under the koma before you start couching. You get better tension with the thread coming out from underneath.
Hold the Koma with your Non-Stitching Hand
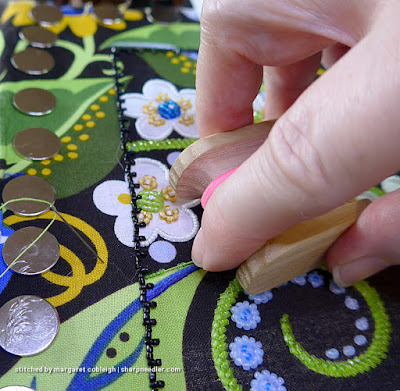
I'm left-handed so I hold the koma with my right hand (and somehow take pictures with my left even though cameras are made for righties). I generally hold the koma between my thumb and middle finger. Sometimes I grasp it a bit more closely, which is how I found out that it was important to do a good job of burying the needle!
I know there are at least a handful of right-handers reading this, so just imagine the images reversed.
Use Your Index Finger to Feed Beads for Couching
Using the index finger of the hand holding the koma (non-stitching hand), feed beads to be couched. A fingernail is very useful for pushing the beads along. I'm couching every two beads in this example. Pull very firmly on the koma and keep the bead string taut as you couch.
The couching thread is in my stitching hand (i.e., left) and as I feed the beads from the bead thread I couch with the stitching hand. You can get into a pretty good rhythm and the couching goes fairly quickly.
Finishing
When you are done with the couched line of beads, unwrap the bead thread from the koma, remove any excess beads and plunge the bead thread. Tie the bead and couching threads off as appropriate. Give your koma a big hug and a 'thank you' for a job well done!
The more I've used the beading koma on this project, the better I've become at holding tension on the bead thread. I didn't pull tightly enough when I first started using the koma, and as I increased the tension the lines of beads became neater and smoother. I now hold the string quite taut when couching. By the way, you don't need to keep tension on the string except when you are actually stitching. The koma is simply excellent for creating tension. It fits nicely in my hand and is very easy to hold.
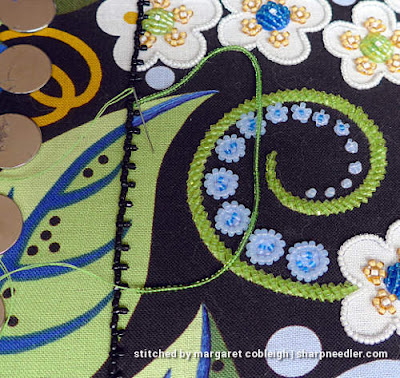
Here's the finished outline of couched beads:
There are other ways to put tension on the bead thread. You can lash two small regular koma together or use a straight pin to hold the thread in place. I haven't tried either of these methods. I think the beading koma is probably easier and/or more stable. Mary Alice is a very experienced Japanese bead embroiderer, and the design of the koma leaves no doubt that she knows exactly what is needed!
In future, if I have a line of beads to couch on any type of project, not just Japanese bead embroidery, I'm going to be using the beading koma.
References
- Beading koma are available for purchase from Mary Alice Sinton
Blue Bonnet Studios: Beading Koma


Thank you for sharing this in great detail Margaret! I purchased a beading kit from merrilyn Whittle and got a koma as well. Alas, I am being a good girl and won't start the project before the pile of already started projects is out of the way :). But oh, I am looking forward to it!
ReplyDeleteThanks for introducing me to this great tool. I love my beading koma :)
ReplyDeleteGlad to be of service! :-)
Delete