I hope I can convey some of this bling in a few of these photographs. It's difficult to capture.
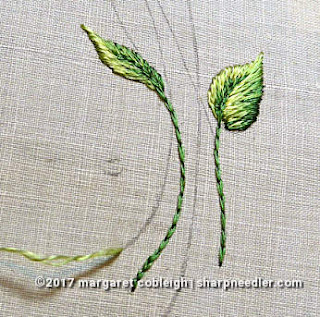
Often, when strong light such as sunlight or artificial light hits the thread directly--especially the greens--the silk lights up to such a degree that it looks like it's lit from within, as if it's electrified. It's quite striking and beautiful, but it can be difficult to embroider with because it's like stitching with a string of light.
Because of this effect, I have to avoid direct, bright light; it's also difficult to stitch at night with artificial lighting. Optimal conditions seem to be bright but indirect sunlight. That being said, I do sometimes stitch in sub-optimal conditions! When that happens, I stitch more by feel than by eye.
The way in which light hits and bounces off the threads is interesting, or perhaps not if you're trying to take photographs! The finished stitching looks completely different depending upon how the light interacts with the thread. Sometimes, I can see almost no shading at all! At other times, the shading looks fine.
Shading the Violets
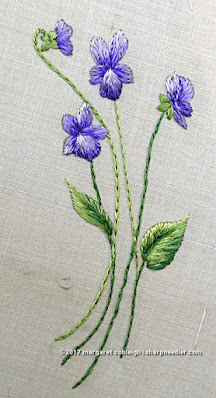
I thought I would share how the violets are stitched. I have a very simple plan that I apply to each flower with appropriate adjustments depending upon the shape and type of flower. The flowers consist of buds, sideways flowers, or full frontal blossoms.
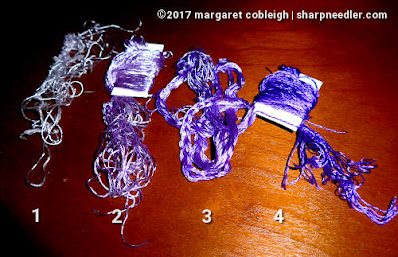
I am working with four purples. The fourth one is very dark and my camera refuses to accurately capture the colour! The lightest one is my problem child. The thread skein is in poor condition and has a large, unbreakable knot in the centre, and therefore I am limited to very short pieces of thread cut from around the knot. Since I'm not using a lot of this particular shade the short lengths aren't too much of an issue.
 |
| Four shades of antique purple silk embroidery thread |
I work the petals from outside to inside and light to dark, except for the lower central petal.
I use just a little bit of colour 1 on the top of the flower or towards the left (A/B). I vary the placement in order to ensure that the flowers between the assorted violet bunches are different. Then I add colour 2 and 3 (B/C). I generally only use 2 and 3 on the side petals (C).
The lower central petal, always stitched last, is worked in reverse. Starting at the bottom I stitch dark to light. I primarily use colour 3, then 2. I finish the top with a few stitches of 1 (C).
The flowers are filled completely with shades 1 through 3. Then, I add in the darkest purple, 4, as shadow (D). I also use this colour to create some separation between the petals whenever possible. These flowers are tiny, about the size of my thumbnail, so there's not a lot of opportunity to add much detail.
I've completed the second pair of violet motifs. This bunch of violets is the largest of the three different designs.
Four of the six violet motifs are now complete, two to go!
Back to Buttonholing
It's time, once again, to work some of the buttonhole edging. I'm doing four in this batch of scallops and that will leave only--only--four at the very end of the project.
When I begin one of the buttonholed edges the first stitch I make is a chain stitch, then I go into the buttonhole. I learned this tip from a Jane Nicholas stumpwork class; this is how she recommends that you start the buttonhole edging on a piece of stumpwork wire. It works great with a regular buttonhole edging as well.
 |
| Starting with a chain stitch |
The four latest scallops are done. Stitching four scallops was much better than stitching eight!
Only two more violet bunches and four more scallops to go.


Thanks for this, Margaret - it's great to see your stitch plan for the violets close up. I'd love to see a similar set of pictures for the leaves - it looks as though you have shaded one side dark to light and the other light to dark, to get some directional highlighting - is that right? it's a bit hard to tell with the bling!
ReplyDeleteI'm glad to hear that the stitch plan for the violets was interesting. I will work on one for the leaves.
DeleteBy the way, you are correct in your description of how the leaves are shaded.
Absolutely gorgeous! Those flowers look real enough to pick!!
ReplyDeleteOh, that's very kind. Thank you!
DeleteI’m not a fan of filament silk for silk shading either. I can’t imagine how difficult it is. Such a difficult thread to stitch with a the best of times!
ReplyDeleteThanks for the close ups with the details of the violet shading. Love the purples!
ReplyDeleteComing along beautifully!
ReplyDelete